‘Rice Paper’

Regularly here at ZAC, we’ll get calls inquiring about whether or not we can work on a piece that’s been drawn, printed, or painted on ‘rice paper.’ Since this is almost never true, we thought it’d be a good idea to write a post uncovering the myth of rice paper in the fine arts.

Japanese papers are commonly referred to as ‘rice papers’, a term that is both incorrect and misleading. Papers from Asia and Japan in particular are not made from rice at all, but from plant fibers formed into sheets. The Japanese have traditionally made paper from three different plants – KOZO, GAMPI and MITSUMATA. These plants all are characterized by long, strong fibers that impart the distinctive characteristics Japanese papers are known for – thinness, flexibility and strength. They have been used historically for art, calligraphy printing, collage, bookbinding and screens. More contemporary applications have included lighting and architecture.

KOZO  derives from a variety of mulberry plants; the majority of handmade papers from Japan are made of kozo.

MITSUMATA has the shortest fibers of the three plants used in papermaking and produces a soft dense paper that is warm in color. The shrub is indigenous to Japan.

GAMPI  is the rarest of the three trees used for papermaking and one not easily cultivated; it mostly grows wild. Gampi papers are made from the inner bark of the gampi bush and the finished sheets are known for their sheen and transparency. Gampi papers are excellent for printmaking, especially chine colleé.

There is a material which is also sometimes referred to as ‘rice paper’ because is comes from the inner core of the Tetrapanax papyriferum (rice paper tree). It is a non-fibrous, pith-like material cut from the inner core of the tree and split into thin layers which when dried can be written or painted on. It therefore is not manufactured in the same way as sheets of paper are but is a surface that is used as a writing material.

In conservation, Japanese paper is celebrated for its inconspicuousness and strength. At ZAC, we use it every day to treat and mend tears, and as a support for lining fragile works on paper. There are, of course, plenty of more beautiful applications of this material.

Next: a post dedicated to artists and craftspeople using paper in their practice.
April Workshop

April Workshop

We are excited to host a Japanese Paper Essentials workshop here at the studio in collaboration with Hand Bookbinders of California. Karen will be leading a lecture and workshop on Thursday evening April 10th 6:30-8:30pm and Saturday, April 12th from 10-4pm.

This course is for artists, collectors, bookbinders, framers and appraisers and covers the most essential and useful facts about Japanese paper. There will be an evening lecture and a full day workshop. During the course, students will learn about the characteristics of Japanese paper, including its long history of usage and manufacture. They will learn about the materials used to make these versatile papers, as well as how they are named, and the differences between handmade and machine made sheets. Students will also learn how to color, laminate, and cut Japanese paper, as well as what adhesives are best to use.

For more information, and to register, just click the photo! And stay tuned for our next post debunking the myth of ‘rice paper.’

Characteristics of Paper

Paper in general is highly reactive to light, heat, humidity and acids (both airborne and in adjacent materials). It is absorbent, easily torn and inherently fragile. All paper-based items should be handled as little as possible; they should stored or displayed in an environment that doesn’t contribute to their demise. Attachments such as tapes, hinges, enclosures, etc., should be of acid-free materials. The best protection for art is an archival quality mat or folder, a well-constructed frame with UV filtering glazing, or flat storage in a well-ventilated area.

AGING OF PAPER

Paper will age more slowly if it is made of 100% cotton fibers and is free of bleaches, artificial brighteners, surface coatings and other fillers. Choose papers with the highest content of cotton fiber, known as ‘rag,’ and ones that are acid-free. Ideally, the best paper would be an all-rag paper with a pH of 7.5 or higher.

All materials that are in contact with the artwork should be similarly high quality (acid-free, buffered with an alkaline compound, like calcium carbonate) so as not to affect the paper adversely.

WHAT DAMAGES PAPER

1. LIGHT: all forms of light, whether sunlight, incandescent, fluorescent, halogen or LED are harmful to paper as well inks and colors. Depending on the fiber content, paper can darken and become brittle, or bleach and fade. Even indirect sunlight can, over time, be damaging to all the components of paper and media. Use of Ultra-violet filtering acrylic or glass will reduce light damage, but framed artwork should be always hung in indirect light.

2. HEAT: heat will dry out and embrittle paper, causing it to shrink and distort. Do not hang works of art near any source of heat or place a lamp near the surface.

3. HUMIDITY: relative humidity above 70% encourages mildew or staining on paper. It will also cause paper to expand and/or distort. Avoid hanging art on damp or ‘outside’ walls, but if you do, place bumpers on the corners of the back of the frame to hold it away from the wall, so air can circulate behind it. Make sure there is space between the art and the glazing (glass or acrylic).

4. ATMOSPHERIC POLLUTANTS: Air contains a number of gases that deteriorate paper (such as ozone, sulfur dioxide, carbon monoxide, nitrogen oxides, & lead). Framing an artwork greatly reduces exposure to these pollutants and will limit the changes in heat and humidity that occur in unregulated rooms. Storage in acid-free boxes or folders, in drawers, will provide reasonable protection as well.

WHAT TO LOOK FOR

Protective housing with alkaline (acid-free, buffered) paper or board

Stable environment with minimal fluctuation of temperature and humidity; low light levels

Japanese paste as the adhesive for attachments such as hinges

Lineco™ archival paper tapes and mounting corners

WHAT TO AVOID

All pressure-sensitive tapes (Scotch, Masking, duct, any double-sided tapes) spray adhesives, Rubber cement, Elmer’s glue, YES paste, Titebond wood glue

All heat-set (dry mount) films and photo mount sprays

Non-archival backing boards, including all ordinary color matboards, corrugated cardboard, Masonite, plywood, manufactured fiber boards; felt-tipped pens (which fade easily), and ball-point pens which are not stable in light or in the presence of moisture.

Getting Ready: Disaster Preparedness

It is important to have some basic information regarding protection of your family’s possessions in case of fire, flood, earthquake, etc.  Knowing how to prepare for such situations is crucial when you only have a few minutes to leave your residence or workplace and want to know what to take.

Your concerns may be about whether to gather works of art because of their value or family documents and photographs because of their sentimental and historical importance.  No matter how many or few of these treasures you have, there are some basic steps to take to protect letters, legal documents, genealogy charts, heirlooms, photographs, and rare books. They will also help you get organized in general. Here are some tips to help you be better prepared:

  1. Sort through any valuable items and, to the extent possible, photograph treasured items and make photocopies of documents. The duplicates should be placed in a separate box from the originals and preferably stored at another location (a relative’s house or workplace, for example). Alternatively, digital images and scans can be saved to an external storage device, like a hard drive or USB drive, and kept in a different location for back-up.
  2. Keep photos in archival albums that are easy to grab, such as in a bookcase or storage box that is accessible.  Place labels on the outside that identify the contents, written in pencil or permanent pen ink. Graphite is stable in water. Felt-tipped pens and markers will bleed with moisture and fade over time.
  3. Keep storage boxes away from water pipes (water heaters too) that could break and flood on your treasured items, causing water and mold damage.
  4. For framed art and documents, make sure hanging hooks and wires are strong, oversized and well anchored into the wall or moulding. I can’t tell you how many artworks and frames require repair because the wires give way or an earthquake shakes them loose. When they fall it can be onto a corner of a table or through a vase. Acrylic glazing is preferable to glass because it won’t shatter and damage the contents of the frame.
  5. You may need supplemental insurance for earthquakes. Make sure your homeowner’s policy covers your contents. Heirlooms should not require a Fine Arts rider, but should fall under your regular homeowner’s policy. You will still need photos and values for a claim, and for important items that have been purchased, a copy of the sales receipt with date, description and price is important to have. For a quick “visual inventory” of your home’s contents, make a video.
  6. If you have possessions that you don’t want to lose, spend a little time using available resources that can help with measures to prevent damage before a disaster (or in normal circumstances):
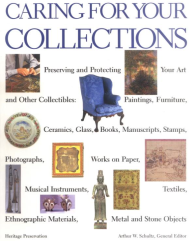
  • Schultz, Arthur, ed. Caring for Your Collections: Preserving and Protecting your Art and other Collectibles. Harry Abrams publication.
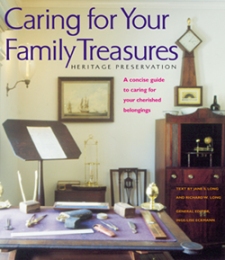
  • Long, Jane & Richard. Caring for Your Family Treasures. Heritage Preservation, Harry Abrams publication, 2000 paperback.

Screen Shot 2014-02-03 at 12.37.46 PM      treasures

Getting to Knoll Us

If you’re like us and frequently find yourself adjusting the angles of objects–making your knife parallel to your placemat, or grouping similar objects on your desk–chances are you’re knolling and don’t even know it.

Knolling is the process of grouping like objects and arranging them in parallel or 90 degree angles.

And we do a lot of that around here.

According to Wikipedia,

“The term was first used in 1987 by Andrew Kromelow, a janitor at Frank Gehry’s furniture fabrication shop. At the time, Gehry was designing chairs for Knoll, a company famously known for Florence Knoll’s angular furniture. Andrew Kromelow would arrange any displaced tools at right angles on all surfaces, and called this routine knolling, in that the tools were arranged in right angles—similar to Knoll furniture. The result was an organized surface that allowed the user to see all objects at once.”

Pair of lounge chairs (model no. 65) Knoll, designed 1950

Now, it is most popularly used by the American sculptor Tom Sachs, who picked up the term while working as a fabricator at Gehry’s studio. Not only does knolling appear throughout his body of work, but it is also a tenet of organization in his studio.

A page from Tom Sachs’ “Ten Bullets”

While we may not take our knolling as seriously as Sachs does, it’s certainly  happening all around us–from minor adjustments to the stapler, to a sort of conservator’s mise-en-place before beginning a treatment. Here are some examples of knolling around the studio here at ZAC.

old knolled irons

preparing to examine new work

knolling in the office (Jeana’s desk)

knolled rolls (of paper)

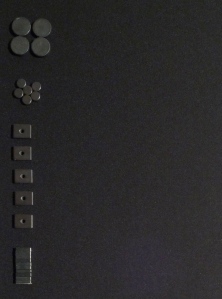
magnets in the photo studio

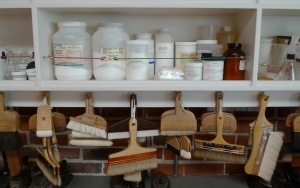
happily knolled brushes

So, the next time you find yourself compulsively tweaking the objects in your surroundings, take comfort in knowing there’s a name for it.

For more knoll-spiration, check out Things Organized Neatly, a blog dedicated entirely to the art of knolling.